
Copyright © 2022 Adewo Automation Equipment Co.,ltd. All rights Reserved.
Links Sitemap RSS XML Privacy Policy

Paper bags are everywhere—grocery stores, retail shops, takeout counters. But behind every clean, well-folded paper bag is a tool most people never see: the die. A paper bag die is a plywood board with sharp steel rules(cutting rule) and creasing rules set into laser-cut slots. When pressed onto paper, it cuts the bag shape and creates the fold lines in a single stroke.
If you're in the packaging business, knowing how these dies are made—and how to make them faster and more accurately—can make a real difference in your production. This guide walks you through the full die-making process step by step.
Before jumping into the steps, let's get clear on what you're actually building.
A paper bag die is a steel rule die. It has three main parts:
- Die board: A thick plywood board, usually 12–18mm, made from birch or maple veneers. It needs to be strong, flat, and stable—because any warping will throw off the entire die.
- Cutting rules: Thin steel blades, usually 2pt or 3pt thickness, that cut through paper.
- Creasing rules: Shorter, blunt rules that press fold lines into the paper without cutting it.
A designer creates a die layout in CAD software (AutoCAD, Illustrator, or Cimex), using different colors or layers to separate cutting lines from creasing lines. The file is exported as DXF or DWG—the standard formats for die-making software. Then the process moves to the workshop.
Before you start, make sure you have:
- Die board: 12–18mm laser-grade plywood (birch or maple)
- Cutting rules: 2pt (0.71mm) or 3pt (1.07mm) steel rules
- Creasing rules: Typically 2pt or 3pt, shorter than cutting rules
- Rubber ejection material: Rubber strips placed around rules to push the paper off after cutting
- CAD design file: DXF or DWG format
- Laser cutting machine (or access to one)
- Rule bending equipment (manual or automatic)
-Creasing cutting machine
Everything starts with the design. You need a CAD drawing that shows exactly where the bag will be cut and where it will be folded. Think of it as a road map for the die.
- Confirm the bag style, size, paper thickness, and folding structure.
- Create or receive a CAD file in DXF or DWG format.
- Mark three types of lines clearly: cutting lines (solid), creasing lines (dotted or dashed), and perforating lines if needed.
- Double-check your dimensions. A small error in the design becomes a big error in the die.
Once the design is ready, import the DXF file into the laser cutting software.
- Set the scale and origin point.
- Map the layers so the software knows which lines are cutting lines and which are creasing lines.
- Enter the die board thickness and material type.
- Set the laser power, cutting speed, and kerf compensation.
The "kerf" is the width of the slot the laser burns into the board. This is critical. If the slot is too wide, the rule will be loose and may pull out during a press run. If the slot is too narrow, the board can warp or even split. Standard slot widths are 2pt (about 0.71mm) or 3pt (about 1.07mm).
Place the plywood die board on the machine table. Align it with the zero point and clamp it securely. A board that shifts during cutting means a ruined die. Most modern machines use a probe or auto-following system to adjust for slight variations in board thickness, keeping the laser at a consistent distance.
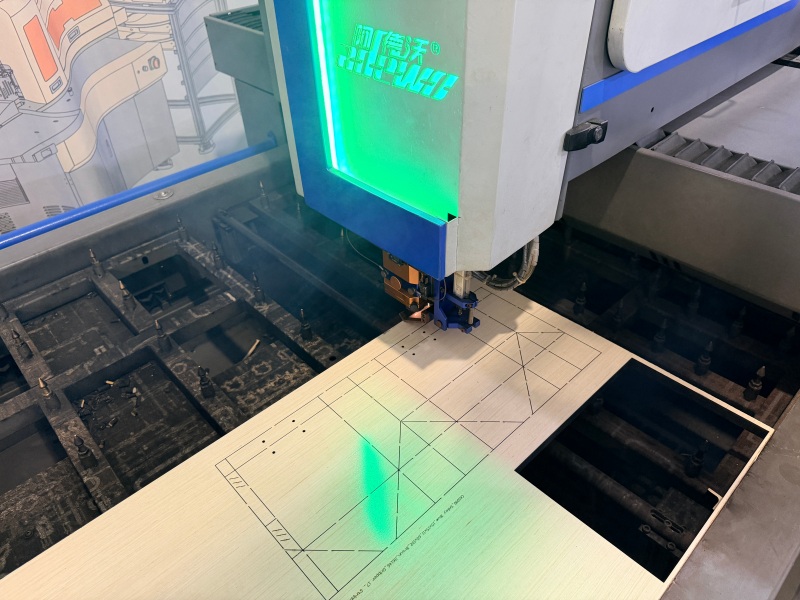
This is where the die starts to take shape. A CO2 laser burns precise slots into the plywood along the cutting and creasing lines.
- Start the cutting program and monitor the first few slots.
- Check that the slot width and depth match your specifications.
- Watch for bridges—small uncut sections that hold the die board together between closely spaced rules.
- After cutting, remove waste material and inspect the board.
The laser doesn't cut all the way through. It burns slots deep enough to hold the rules securely while leaving the bottom of the board intact.
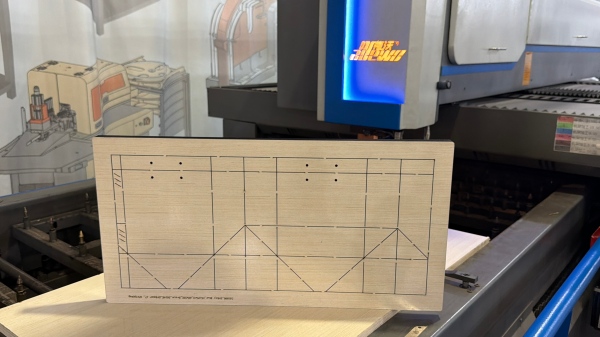
Now you need to shape the steel rules to match the die design. Cutting rules are sharp blades; creasing rules are blunt and slightly shorter.
- Select the correct rule thickness and height for your die board.
- Bend the rules to match the curves and corners in the CAD design.
- Cut each rule to the required length.
- For complex shapes, you may need to bridge (notch) the rules at stress points to prevent cracking.
In manual shops, this is done with a rule bender and a rule cutter. In more advanced shops, an automatic bending machine handles the entire process from a digital file, bending and cutting rules with far less manual error.
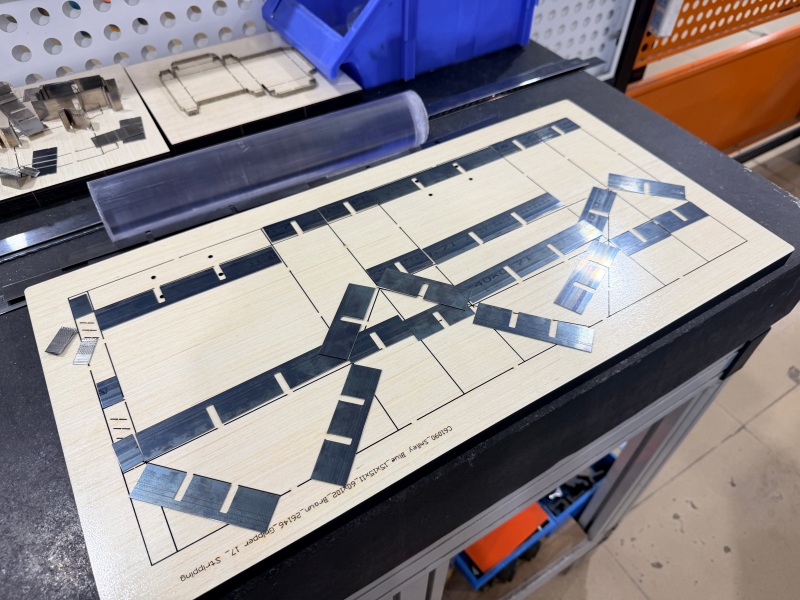
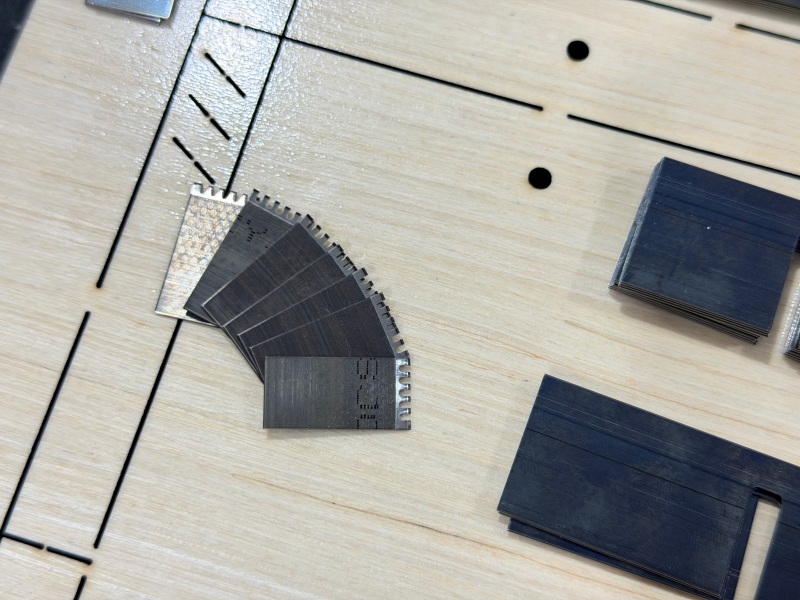
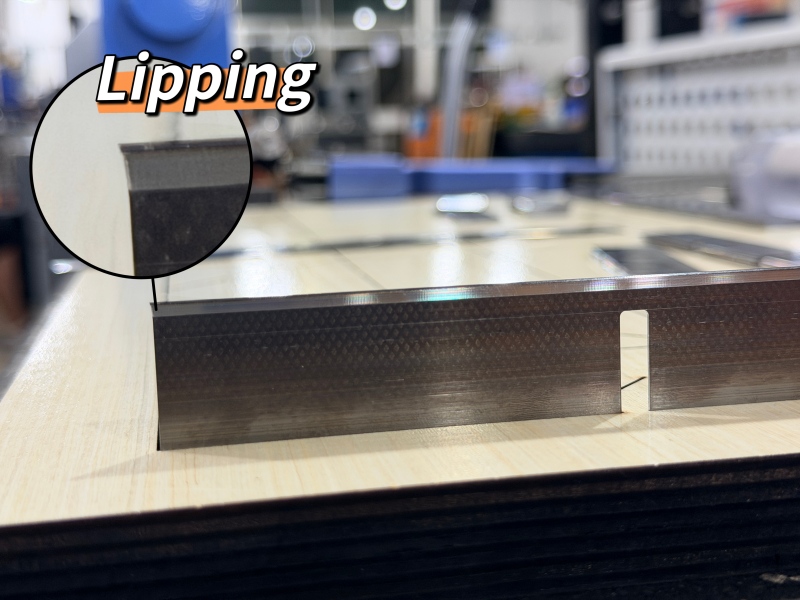
With the board cut and rules shaped, it's time to assemble the die.
- Insert cutting rules into the slots along the cutting lines.
- Insert creasing rules along the crease lines.
- Check that every rule sits at the correct height and fits tightly in its slot.
- Make sure all rules are level. A rule that sits too high will cut too deep; one that sits too low will miss the paper entirely.
This step is often called "rule insertion" or "die assembly." It's detail work, but getting it right means the difference between a clean cut and a messy one.
After the rules are in, you need rubber. Rubber strips are placed around the rules, slightly higher than the cutting edge. Their job is simple: when the die presses down and cuts the paper, the rubber pushes the paper back off the die so it doesn't stick.
- Place rubber strips evenly around all rules.
- Make sure the rubber sits higher than the rule edge.
- Check that the rubber doesn't block any cutting or creasing areas.
- Test the ejection by pressing a piece of paper against the die and lifting it away.
Before the die goes into production, you need to test it.
- Run a test cut on the actual paper bag material.
- Check the cutting quality: Are the cuts clean? Is the paper fully cut through?
- Check the crease quality: Does the paper fold cleanly along the crease lines? Any cracking or tearing means the creasing rules need adjustment.
- Check the ejection: Does the paper release smoothly from the die?
- Adjust any rules or rubber as needed.
- Once everything is correct, clean the die, label it with the bag type and size, and store it properly.
In paper bag die making, the main equipment steps are cutting the die board, bending the steel rules, and preparing creasing rules. Adewo offers three machines that cover these stages. Each one can be used separately or as part of a small production line.
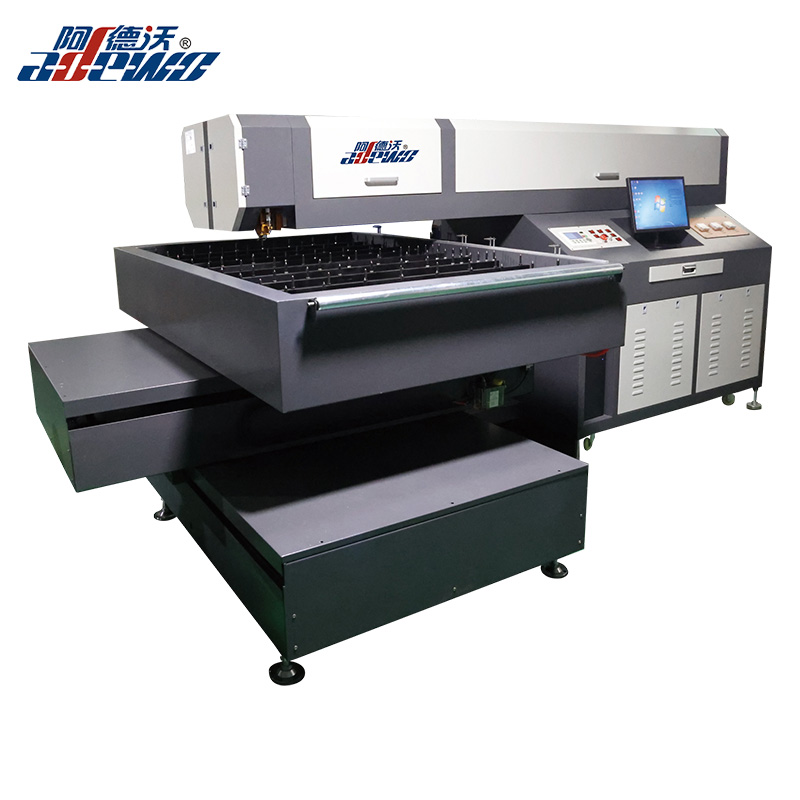
1. ADW-LC600 Head Fixed Laser Cutting Machine
After the die design is ready, the first production step is cutting the die board. The ADW-LC600 is a laser cutting machine designed for this job.
It uses a fixed laser head and a moving table, which keeps cutting stable. The imported ground ball screw drive adds durability and high accuracy, while the cross structure supports long-term operation. The auto-follow cutting system allows it to cut different board thicknesses in one pass, and the mirror and lens are easy to replace and clean. It can handle plywood from 6mm to 22mm, as well as PVC board, acrylic, and steel under 3mm.
| Item | Specification |
|---|---|
| Working area | 1200 × 1800 mm (customizable) |
| Laser path | Laser head fixed, table moves |
| Drive type | Imported grounded ball screw |
| Cutting materials | 6–22 mm plywood, PVC, acrylic, steel <3 mm |
| File format | AI, DST, PLT, BMP, DXF |
| Power supply | Single phase 220V, 50/60Hz, 10A |
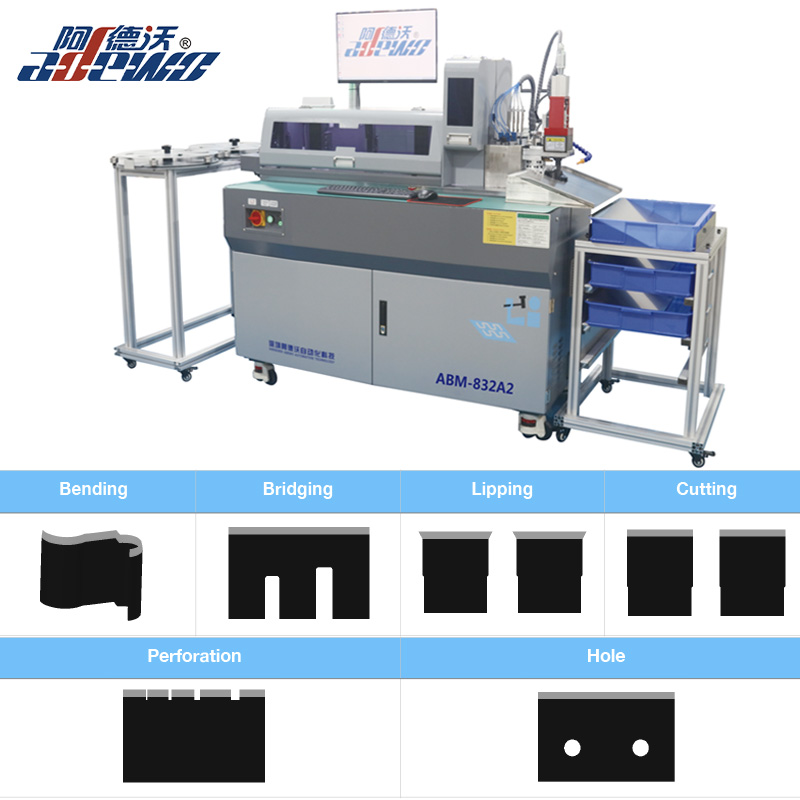
2. ABM-832A2 Auto Bender Machine
Once the die board is cut, the steel rules need to be bent and cut to match the paper bag shape. The ABM-832A2 automates this step.
It combines bending and cutting in one operation, making the process safer and more efficient. The multi-punch tool offers choices like lipping, mold cut, bridge, hole, or perforation, and each tool is independent and easy to replace. Double clamps with screw guide feeding allow continuous operation, and the smart software is easy to use with multiple language options. It supports rule thicknesses from 0.45mm to 1.05mm and rule heights from 8mm to 32mm.
| Item | Specification |
|---|---|
| Rule thickness | 0.45, 0.53, 0.71, 1.05 mm |
| Rule height | 8–32 mm |
| Basic functions | Bending, lipping, mold cut, bridge, flat cut |
| Optional functions | Perforation, hole |
| File format | DXF, DWG |
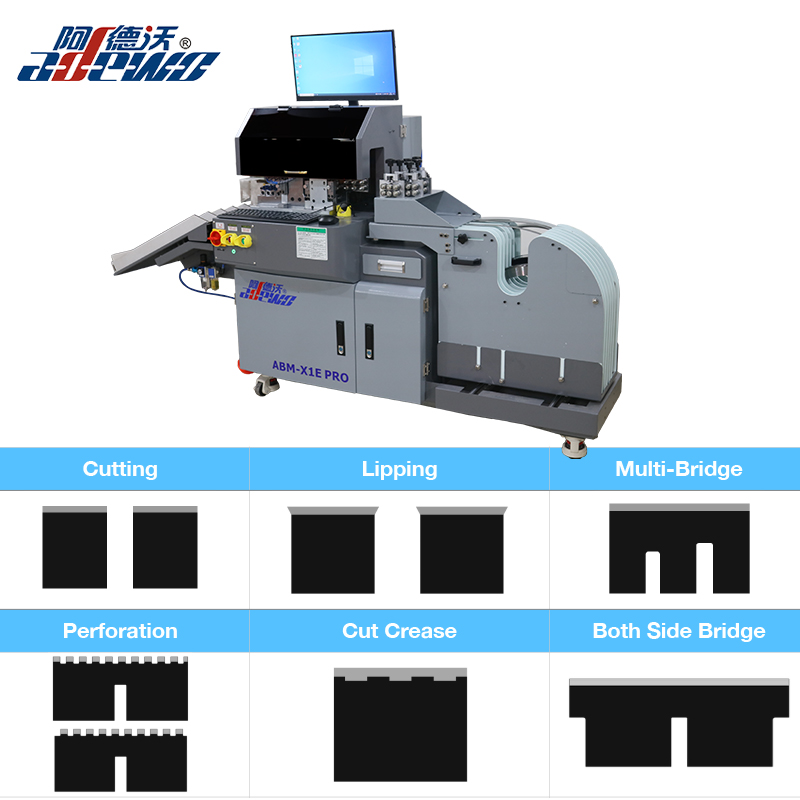
3. ABM-X1E PRO Length Sorting Creasing Cutting Machine
Creasing rules are important for clean folds on paper bags. The ABM-X1E PRO helps prepare creasing rules and related features accurately.
The software automatically identifies different lengths, so you don't have to sort them manually. Tools are customizable, including options for stripping rule and 4pt/8pt laser crease. Each tool is independent and easy to replace, and the servo motor handles auto bridging and auto cutting. The width of perforation and cut crease can be set through the software. A multi-rule cassette holds up to seven coils of steel rule, making changes easy and safe. The machine also supports English and Chinese software and has a small footprint.
| Item | Specification |
|---|---|
| Rule thickness | 0.71, 1.05, 1.42 mm |
| Three-tool functions | Bridging, cutting, lipping, both-side bridge |
| Four-tool functions | Bridging, cutting, lipping, both-side bridge, perforation |
| Optional functions | Cut crease, corner cut, 4pt/8pt creasing rule, stripping rule |
| File format | DXF, DWG |
- Die shops producing paper bag dies regularly who want to reduce turnaround time.
- Packaging companies that need faster die production to meet tight delivery schedules.
- Manufacturers looking for better consistency and repeatability across jobs.
- Businesses planning to scale paper bag die production without proportionally increasing labor costs.
Making a paper bag die is a multi-step process that demands precision at every stage—from CAD design and laser cutting to rule bending, insertion, rubbering, and testing. Getting any one of these steps wrong means a die that doesn't cut cleanly, doesn't crease properly, or doesn't last.
The good news is that much of this process can be automated. If you're producing paper bag dies and want to improve speed, accuracy, or consistency, these machines are worth exploring. You can contact Adewo for a demo, machine specifications, or technical support tailored to your production needs.
Copyright © 2022 Adewo Automation Equipment Co.,ltd. All rights Reserved.
Links Sitemap RSS XML Privacy Policy